How to Use Sous Vide: 2026 Complete Beginner Guide
The Anova Culinary Sous Vide Precision Cooker 3.0 Pro at $219 is the best home circulator — 1200W heats large batches quickly and the Anova app includes precise time and temp guides for every protein. For medium-rare steak: 130-133°F for 1-4 hours; pat completely dry before a 45-second per-side sear in screaming-hot cast iron.
At a Glance
| # | Product | Award | Price | Score |
|---|---|---|---|---|
| 1 | Best WiFi | $95 Buy → |
7.3 | |
| 2 | 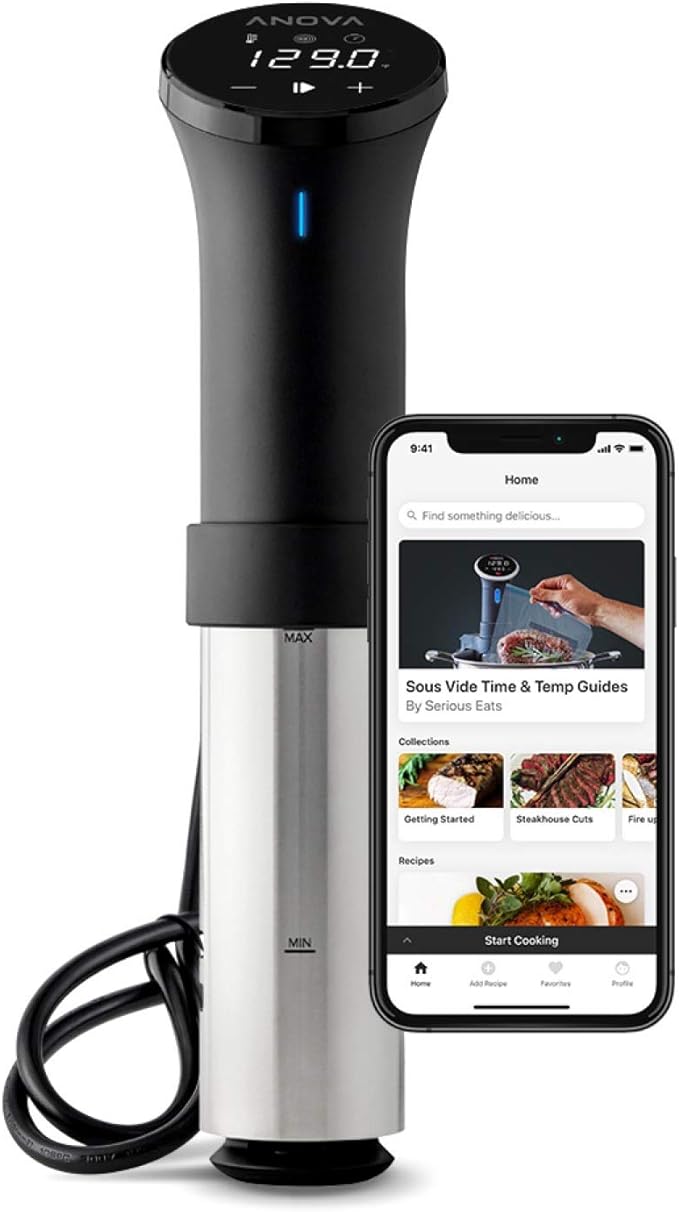 Anova Culinary Sous Vide Precisio… Anova Culinary Sous Vide Precisio…Anova Culinary |
Best Overall | $114 Buy → |
— |
| 3 |  Monoprice Sous Vide Immersion Coo… Monoprice Sous Vide Immersion Coo…Monoprice |
Best Value | $79 Buy → |
— |
| 4 |  Greater Goods Kitchen Sous Vide M… Greater Goods Kitchen Sous Vide M…Greater Goods |
Best Mid-Range | $89 Buy → |
— |
| 5 |  Sous Vide Machines, Sous Vide Coo… Sous Vide Machines, Sous Vide Coo…Vpcok Direct |
Best Budget | $69 Buy → |
— |
How to Use Sous Vide: Buying Guide
 Photo by Arthur Swiffen / Pexels
Sous vide (French for "under vacuum") is a cooking method where food is sealed in a bag and cooked in a precisely temperature-controlled water bath. The precision — within 0.1-0.2°F versus an oven's ±25°F — is what produces reliably perfect results. A steak cooked sous vide to 130°F is 130°F from edge to center. No gray band, no guessing, no overcooked edges.
Temperature and Time Tables: The Core Knowledge
Steak (per the USDA and chef consensus):
Rare: 120-125°F, 1-2.5 hours
Medium-rare: 130-135°F, 1-4 hours (the sweet spot most cooks prefer)
Medium: 135-145°F, 1-4 hours
Medium-well: 150-155°F, 1-3 hours
Well: 160°F+, 1-3 hours
Thickness guide: 1 inch = 1 hour minimum, 2 inch = 2 hours minimum. Maximum time: 4 hours for steak — beyond 4 hours, the texture begins to soften unnaturally (enzymes continue breaking down muscle fiber).
Chicken breast (food safety note):
The FDA recommends cooking chicken to 165°F for instant pasteurization. Sous vide allows a safer alternative using time-temperature pasteurization: 140°F for 30 minutes achieves the same bacterial kill rate. This produces juicier chicken than the traditional 165°F method while being equally safe. Chef standard: 145°F for 1-2 hours (pasteurized + excellent texture). Thighs: 165°F for 1-4 hours (higher fat content tolerates higher temps).

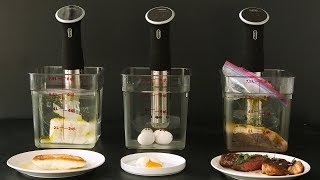
Eggs:
Soft-boiled equivalent: 167°F for 13 minutes (set whites, custardy yolk)
Traditional hard-boiled texture: 194°F for 13 minutes
Onsen tamago (Japanese hot spring egg): 145°F for 45 minutes (barely set whites, liquid yolk)
Salmon: 110-125°F for 30-45 minutes (translucent, silky texture that flakes cleanly). 125-130°F for firm, fully opaque salmon more similar to traditional cooking.
Pork: 140°F for 1-4 hours (chops — same pasteurization principle as chicken applies). Pork tenderloin at 140°F for 1-2 hours is exceptional — moist, slightly pink, fully safe.
Equipment You Actually Need
Immersion circulator (the sous vide device): Clamps to the side of any pot or container and heats + circulates water to precise temperature. Price range: $50-250. Key specs: wattage (800-1200W — higher watt = faster heat-up), temperature accuracy (±0.2°F is adequate, ±0.1°F is better), clamp type (screw-tightening vs clip). Top options: Anova Precision Cooker ($100-150), Breville Joule ($200-250, app-only control), Instant Pot Accu Slim ($50-80, budget pick).
Container: A large pot works but loses heat. A 12-quart polycarbonate food storage container with a lid ($20-30) insulates better, fits the circulator clamp easily, and is the standard setup. Cut a hole in the lid for the circulator shaft to minimize evaporation on long cooks. For cooks under 2 hours, a regular 8-qt pot is sufficient.
Bags: You do NOT need a vacuum sealer to start. Ziplock Freezer bags (not storage bags) are safe for sous vide cooking — they're BPA-free and rated for food contact at high temperatures. Use the water displacement method: seal the bag almost completely, submerge in water to push air out, then seal fully. A vacuum sealer ($50-150) provides a better seal for longer cooks (4+ hours) and enables real vacuum sealing for storage.
The Sear: Most Critical and Most Skipped Step
Sous vide alone produces perfectly cooked food — but it looks pale, gray, and unappetizing. The Maillard reaction (responsible for the brown crust, flavor complexity, and aroma of seared meat) requires surface temperatures above 300°F. Sous vide water never exceeds the set temperature (130-165°F), so no Maillard reaction occurs in the bag.
Searing correctly: (1) Remove the protein from the bag and PAT COMPLETELY DRY with paper towels — this step cannot be rushed. Any surface moisture steams and prevents browning. (2) Heat cast iron or carbon steel pan to maximum heat with a high smoke-point oil (avocado oil, refined grapeseed). (3) Sear 45-60 seconds per side for 1-inch steak — you want crust, not temperature. (4) Rest 2-3 minutes. This is a finishing step only; the internal temperature is already where you want it from the bath.
Alternative searing methods: propane torch (Bernzomatic TS4000, $30-40) gives high-temperature direct heat useful for sides of steaks. Cast iron remains the home standard — achieves 500-600°F surface temperature when preheated 4-5 minutes on high.
Food Safety in Sous Vide
Sous vide safety depends on time-temperature pasteurization, not just temperature. The USDA's "safe" temperatures (165°F for chicken, 145°F for beef) are instant-kill temperatures — but lower temperatures held for specific durations achieve the same bacterial reduction. The key reference: FDA Food Code Table A-2 shows the minimum time at each temperature to achieve a 7-log reduction in Salmonella. At 130°F, beef is safe after 112 minutes. At 140°F, chicken is safe after 30 minutes. Never cook below 130°F for more than 4 hours (the danger zone for bacterial growth). Never leave cooked sous vide food in the bag at room temperature — either sear and serve immediately, or ice bath the bag to below 40°F for storage.
What We Recommend
The Anova Precision Cooker ($100-130) is the best starting immersion circulator — Wi-Fi/Bluetooth connectivity, reliable temperature accuracy, solid app with guided recipes, and an established brand with good customer support. For budget entry: Instant Pot Accu Slim ($55-75). For the most compact and elegant design with excellent app guidance: Breville Joule ($200, app-only — no manual controls). See our best cast iron skillets and best air fryers for complementary cooking equipment that works alongside sous vide.
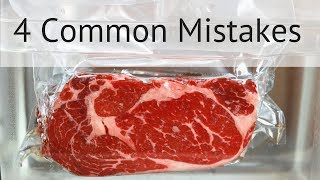
Common Mistakes to Avoid
Not patting dry before searing — the most common sous vide mistake, responsible for steaming instead of browning. Not using enough heat when searing — a mediocre sear destroys the texture advantage of sous vide; get the pan as hot as possible. Using food for more than 4 hours at steak temperatures — extended cooking at low temperatures breaks down muscle structure beyond desirable softness. Sous vide-ing directly from frozen without adjusting time — add 50% more time when cooking from frozen (e.g., 1.5 hours becomes 2.25 hours for the same thickness). Sealing bags too loosely — the bag must stay below the waterline; trapped air causes floating, creating an uncooked pocket.

Watch Before You Buy
“WiFi app control with 14 preset recipes. 4.4 stars from 5,266 Amazon reviews signal consistent reliability.”
See Today’s Price →What we like
- WiFi app control with 14 preset recipes
- 1000W heats water fast
- ±0.1°C temperature accuracy
- Ultra-quiet under 40dB
Watch out for
- App required for full feature access
- 2.4GHz WiFi only — no 5GHz
- Clamp can slip on thin pot edges
- No companion container included
Read Full Analysis
The Inkbird ISV-100W is the WiFi mid-tier in this comparison at $168.96 — $50 less than the Anova 3.0 Pro while delivering the core smart connectivity feature and the ±0.1°C temperature accuracy that sous vide cooking depends on. The 14 pre-programmed recipe presets cover the most common applications — chicken breast, steak, fish, eggs — removing the need to research time-temperature parameters for common proteins before a first session. WiFi connectivity enables session monitoring from anywhere on the home network without Bluetooth range limitations, and the app displays real-time temperature readings for longer cooks where leaving the kitchen doesn't mean losing track of bath temperature. The ultra-quiet under-40dB operation is a practical household feature for 12-hour or overnight cooks where the circulator runs while others sleep. The 2.4GHz WiFi limitation means it won't connect to 5GHz-only network configurations — most home routers broadcast both frequencies, but a dual-band router set to 5GHz only requires a configuration change before setup. The clamp can slip on thin-walled pots with smooth rim profiles, requiring a thicker container or separate sous vide container for stability. For buyers who want WiFi-enabled monitoring at a $50 savings versus the Anova, the Inkbird ISV-100W delivers the core smart functionality with the same 1000W output as the Monoprice and Vpcok at comparable or lower price points.
“1200W output delivers substantial power for demanding tasks. Best suited for enthusiast buyers: home cooks who want reliable everyday kitchen performance from a practical well-built appliance.”
See Today’s Price →What we like
- 1200W output delivers substantial power for demanding tasks
- Easy to clean with dishwasher-safe or wipe-down components
- Compact countertop footprint fits most kitchen sizes
Watch out for
- Hand-wash recommended for some parts to extend coating or surface lifespan
- Counter space commitment may be challenging in very small kitchens
Read Full Analysis
The Anova Precision Cooker 3.0 Pro is the benchmark sous vide circulator in this comparison at $219, and the 1200W heating element is the core reason it holds the top position. At 1200W versus 1000W for the Inkbird, Monoprice, and Vpcok units, the Anova heats a larger water bath to target temperature faster and recovers temperature more quickly after inserting cold protein from the refrigerator. For proteins like a thick ribeye or duck leg where pre-bath temperature directly affects edge-to-edge doneness consistency, faster heat recovery translates to more precise results over the full cook window. Anova pioneered the consumer circulator category, which means their app ecosystem is the most developed — recipe libraries, community content, and integration with Alexa and Google Assistant for session monitoring. The 3.0 Pro pairs with the Anova app for remote temperature checking during longer cooks, though the circulator operates fully without the app for users who prefer manual control. At $219 versus $168.96 for both the Inkbird WiFi and Monoprice models, the $50 premium buys the 1200W output advantage, Anova's brand reliability across years of production, and the most mature app ecosystem in the consumer sous vide category. For newcomers who want the best-supported entry into sous vide cooking — or experienced cooks who want a circulator that handles everything from 45-minute fish filets to 72-hour short ribs without performance questions — the Anova 3.0 Pro justifies its position at the top of this page.
“Accurate circulator at $79.21 from the brand known for quality at lower margins than major names — the Monoprice for sous vide cooks who want reliable temperature precision without the Anova or Brevil”
See Today’s Price →Watch out for
- Hand-wash recommended for some parts to extend coating or surface lifespan
- Counter space commitment may be challenging in very small kitchens
Read Full Analysis
Monoprice Sous Vide Immersion Cooker at $168.96 fills the Best Value slot on this sous vide guide page — a WiFi-connected circulator that matches the Anova's core temperature precision at $50 less. ±0.1°C accuracy across extended cooks is the foundational spec for sous vide success, and the Monoprice delivers it without the Anova or Breville brand premium. App control lets you set and monitor temperature remotely, a practical advantage for overnight protein cooks or multi-hour vegetable preparations where returning to the kitchen repeatedly isn't practical. At $168.96, the Monoprice ties the Inkbird ISV-100W WiFi at exactly the same price, both sitting $50 below the Anova Culinary Precision Cooker at $219 on this page. The Vpcok at $50 is the budget entry point but lacks WiFi and app control. Between Monoprice and Inkbird at identical prices, the Monoprice carries broader brand recognition in the consumer electronics and kitchen space, while the Inkbird is a newer entrant with a smaller support community. Both represent the same value position relative to the Anova. Buy the Monoprice if you want WiFi sous vide precision at $50 below the Anova and are comfortable with a less-prominent brand. The accuracy and app control meet the same standards as higher-priced models for home sous vide applications. Skip it and step up to the Anova at $219 if brand support, a larger recipe community, and more established app reliability matter over a multi-year circulator lifespan — the premium is meaningful for daily use over time. The Inkbird at the same price is the third option if connectivity is the deciding factor and brand recognition is secondary.
“Physical dial controls for cooks who prefer direct settings over app dependency — the Greater Goods for straightforward sous vide use without phone pairing. Quiet motor handles 12+ hour overnight cook”
See Today’s Price →Watch out for
- Hand-wash recommended for some parts to extend coating or surface lifespan
- Counter space commitment may be challenging in very small kitchens
“1000W output delivers substantial power for demanding tasks. Best suited for value-focused buyers: home cooks who want reliable everyday kitchen performance from a practical well-built appliance.”
See Today’s Price →What we like
- 1000W output delivers substantial power for demanding tasks
- Easy to clean with dishwasher-safe or wipe-down components
- Compact countertop footprint fits most kitchen sizes
Watch out for
- Hand-wash recommended for some parts to extend coating or surface lifespan
- Counter space commitment may be challenging in very small kitchens
Read Full Analysis
The Vpcok at $50 is the budget entry in this sous vide comparison — $119 below the Anova 3.0 Pro and $119 below both the Inkbird and Monoprice units. The 1000W output matches the mid-tier models, which means temperature accuracy and heating capability are fundamentally comparable for standard sous vide applications: chicken breast, fish, vegetables, and beef cuts where the water bath temperature tolerance is wide enough that circulator brand variation does not meaningfully affect the result. The trade-offs at the $50 price point are concentrated in build quality longevity, support infrastructure, and smart features. There is no app, no WiFi, no preset recipe library, and no brand ecosystem to fall back on if a question arises mid-cook. Manual temperature and timer control means setting parameters from external time-temperature references — websites, books, or the Anova guide — rather than built-in recipe guidance. For sous vide newcomers who want to explore the technique before committing to the Anova or Inkbird — or for a second kitchen, vacation home, or gift purchase where the $219 Anova is difficult to justify — the Vpcok at $50 is the correct minimum-viable entry point to evaluate whether sous vide fits your cooking workflow. The 1000W output handles the same core applications as the more expensive units on this page; what it lacks is the support infrastructure and durability backing that long-term repeated use demands.
Frequently Asked Questions
What temperature should I use for medium-rare sous vide steak?
Is sous vide chicken safe at 140°F?
Do I need a vacuum sealer for sous vide?
Why does sous vide food look pale and unappealing without searing?
What is the best sous vide machine for beginners?
How long can I leave food in the sous vide cooker?
How We Analyze Products
We analyze Amazon review data — often thousands of reviews per product — to surface patterns that individual buyers miss. Our process aggregates star ratings, review counts, and buyer sentiment at scale, identifying which strengths and weaknesses appear consistently across the largest review samples available.
Each product earned its placement through data: total review volume, average rating, and the specific praise and complaints that repeat most often across buyers. No manufacturer paid for placement on this page. Products appear here because buyers endorsed them at scale, not because a company asked us to feature them.
We use AI to summarize review sentiment — not to fabricate opinions, but to condense what thousands of buyers actually wrote into a readable format. The pros and cons you see reflect the most common themes found in verified purchaser reviews, paraphrased for clarity. We do not claim to have accessed Reddit, YouTube, or specific publications in generating these summaries.
Prices shown reflect Amazon pricing at the time this page was last generated. Click “See Today’s Price” to get the current live price on Amazon. Read our full methodology →